Professional tips on choosing the right drill for you
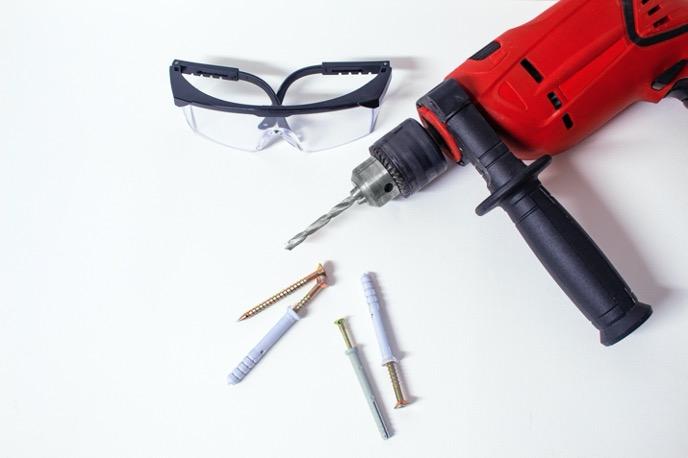
Out of all the tools you will ever need for a DYI project or housework, the drill is likely the most useful. It allows you to accomplish numerous tasks with ease, and it’s highly versatile when it comes to the types of materials you will be working with. We will be focusing on specific terminology, types of drills, and what the specs mean.
Corded or cordless?
As with most power tools, drills also come in corded and cordless variants. The corded drill usually has better power, speed, and endurance. The cordless drill, on the other hand, is far better for mobility and flexibility. Other key differences between them:
Corded drills’ power is measured in amps. The higher the amp rating, the more powerful the drill. Cordless drills’ power is measured in volts and amps per hour. A higher voltage gives you more drilling power, and higher amperage means more prolonged use before needing a recharge.
Usually, corded drills have speeds between 400 and 3000 RPMs, and you control the speed by putting more or less pressure on the trigger. Cordless drills, on the other hand, usually have a speed selector and a speed range between 400 and 1500 RPMs. Of course, the more expensive models are generally faster.
Finally, the most significant difference is mobility. With a corded drill, you’ll most likely need an extension cord in numerous situations. Cordless drills don’t have this problem, but you might need a spare battery to finish your project. You should recharge the extra battery while you’re using the main one so that you don’t run out of juice in the middle of your work.
Understanding the different components of a drill
The drill chuck is the mechanism that holds the shank of the drill bit in place. It comes in two versions: keyed or keyless. A keyed chuck uses a key to change bits and lock the chuck in place, which provides more stability against vibrations. On the other hand, a keyless chuck makes changing between bits much more straightforward. There are also SDS chucks, but those only come on specific hammer drills used for concrete.
The speed range switch does exactly what it says. It switches between slow, medium, or fast speeds, depending on what RPM ranges the drill supports. To screw, choose a slow RPM range to avoid damaging the screw head or the material you’re screwing into. To drill through wood, select a higher speed. To drill through concrete or metal, use lower speed settings.
The forward/reverse switch allows you to select between clockwise and counterclockwise rotations. More specifically, it allows you to either screw or unscrew.
The clutch allows you to select the torque and will also prevent you from stripping screw heads or sinking them too deep. Adjust the drill to a higher torque setting for more power.
The trigger switch works slightly differently, depending on the model. On drills that don’t have a speed selector, the pressure you put on the switch directly impacts how much speed the drill will output. On the ones with a speed selector, the pressure put on the trigger switch controls subtle variations in RPM.
For most purposes and general home use, 20v cordless drills will suffice just fine. But for heavy-duty use, you might want to keep an eye out on all of the specs mentioned above, as well as other things that we will get to shortly.
Other components that matter
If you plan on working in dark places (and it might happen even if you don’t intend to), you will want a drill with an LED work light. They are far better than classic bulb drills because they offer much more visibility.
Some drills also come with a drill bit stand, which will keep your bits handy, so you don’t have to place them on a table or in a separate box.
If you plan on drilling at a perpendicular angle, you might want to consider a drill with a laser level. It will show you if the drill is adequately leveled, and it’s essential in such scenarios.
Finally, the drill bits matter just as much as the drill itself. If you’re uncertain what bits to get, ask at your local hardware store for recommendations on what bits to use for the type of material you will be working on.
Handles and grips
To get a feel of how the drill handles, it’s best to test it out physically. That way, you will see how easily it fits in your hands and how comfortable it might be to hold long-term.
In certain situations, an extra handle is more than welcome. Usually, hammer drills are the ones that come with it. The additional handle gives you greater control and helps maintain forward pressure. However, it also means you’ll be sacrificing space, so it’s not ideal if you’re working in tight junctures.
Right angle drills, on the other hand, are more compact and don’t offer any extra handle. Still, they are easy to hold, and you can use them in tight spaces without breaking a sweat. The downside is that you can’t use them for heavy-duty tasks.
The most common grip found on drills is the pistol grip, and it will suffice in most cases. It’s made in such a way that it can handle both light and heavy tasks to a certain extend. It’s the middle ground, to put it best.
Final thoughts
With so many options on the market today, choosing the right drill for you can get cumbersome. It is important to stay focused and plan out what you will be using your drill for. One more step that will help you out immensely is to take notes of the things you found most important in this article.
By doing so, you will have an easier time finding something that suits your needs and your budget alike. If you’ve never used a drill before, you might want to get some throw-away materials on which to practice. It might sound cliché, but practice does make perfect. No handyman became good at their job overnight.
More to Read:


Previous Posts: